We have provided this page to help you with the multiple aspects of our service. The help docs include information about the web app, its features as well as several mailing tutorials.
Use the Help Docs Menu on the left to navigate. The menu will auto scroll and expand during different sections or you can select the section you are looking for in the menu itself. Please do not hesitate to contact us if you wish.
Arrest Table
Overview
We designed the arrest table around the user. During the design and coding process we built around the premise that it needs to be effective and efficient. The capabilities and features of the arrest table will be enhanced over time with the goal of making it even more efficient and feature rich. The arrest table was designed to appear and function very similar to common tables and spreadsheets in order to provide a familiar look, feel and function.

Select Records
The entire Legal Grab service centers around the ability to pick the arrested individuals you wish to target. We have made selecting individuals as easy as possible.
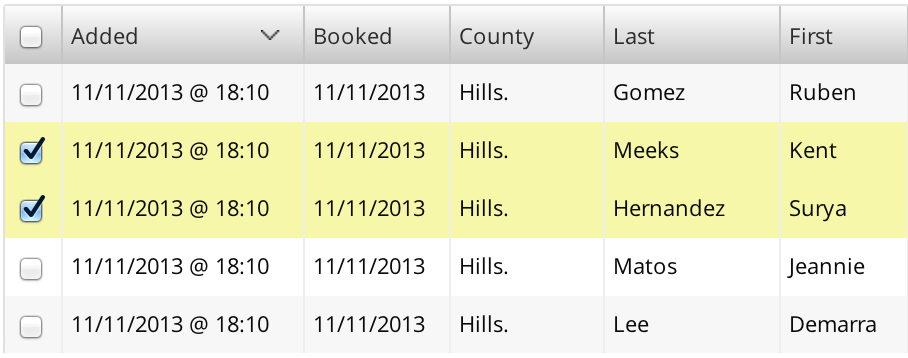
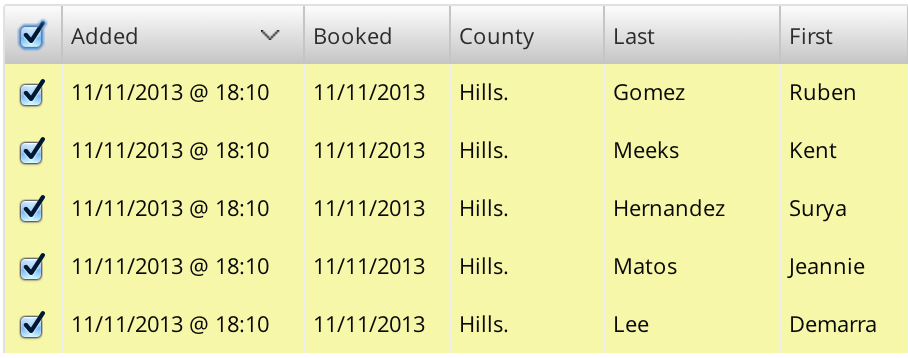
Select Individually or Select All
Selecting records that you wish to export is as easy as one click. You can click on the checkbox for each row or you can click anywhere on the row itself. You can also Select All rows by clicking the main checkbox in the table header. The examples below show selecting individually and selecting all.
Export
After you have selected the records of individuals you wish to mail to, simply click the export button.

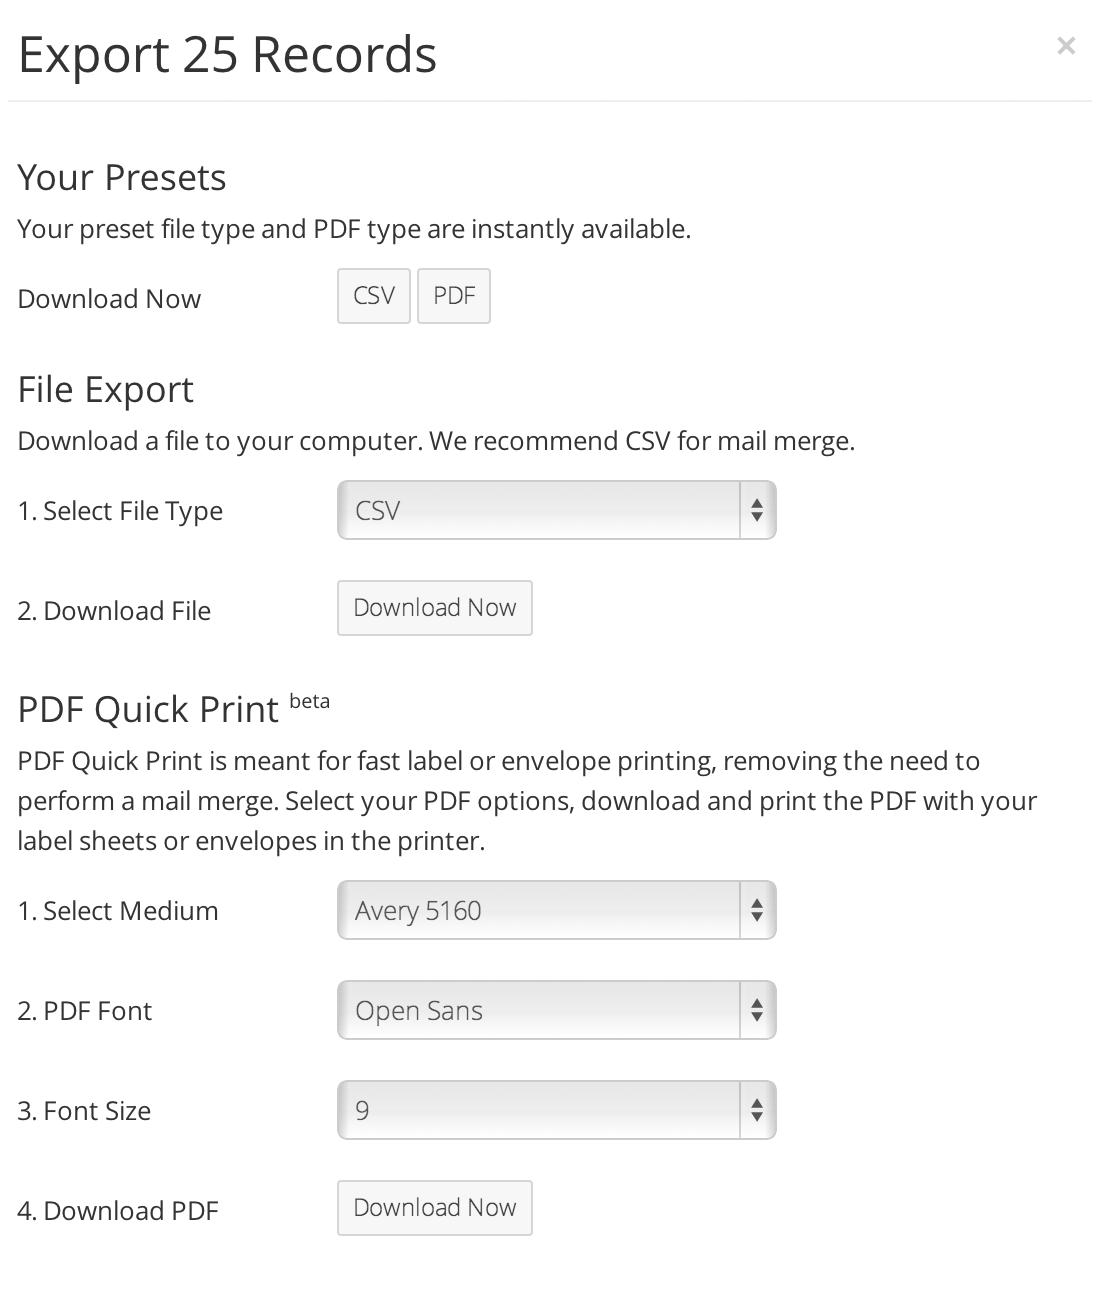
Export Window
After you have clicked the export button a window will appear. This window has several features including the ability to download a csv, xls or xlsx file. You can also download a preformatted PDF Quick Print file for fast label and envelope printing.
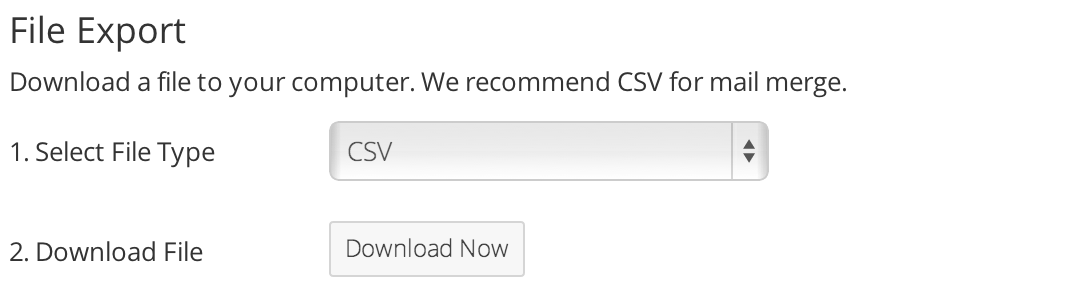
File Export
If you have not created a preset for your file type you can select either CSV, XLS or XLSX to download. Select the file type you wish to export your records as and click Download Now. Set your preset File Type in the Export Settings >File Type section.
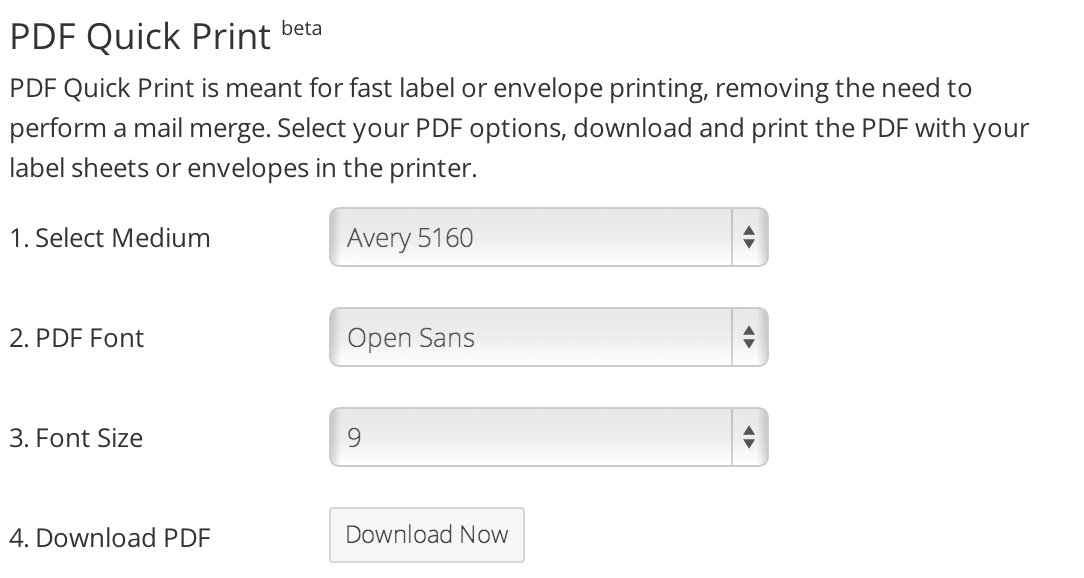
PDF Export
You will no longer need to perform a mail merge if you use the PDF Quick Print. Select your label or envelope type and a preformatted PDF will be created. Simply click Download Now and print all pages of the PDF document directly to your printer. Set your preset PDF in the Export Settings >PDF Medium section.
Your Presets
If you have already set your preset file type and PDF then simply click the respective box. Set your presets in the Export Settings section.

Columns
The arrest table is separated by columns. Each column can be sorted ascending or descending with the exception of the checkbox column.
Column Descriptions
- Checkbox
- The checkbox column contains a checkbox for each row, or in this case each arrested individual. By clicking the checkbox for a row you are selecting the arrested individual for export and ultimately mailing. You can select all visible rows in the arrest list by clicking the checkbox in the table header.
- Added
- The Added Date is the date that the arrest record was added to our system. We attempt to gather the records as soon as possible, even on the same day that the person was arrested. However, some counties delay their information posting. We want our users to know what was recently added to our system regardless of the actual day the person was arrested. This is to insure that you do not miss any records when logging in at a later time.
- Booked
- The Booked Date is the date that the person was arrested. Some counties provide their arrest information on the same day that the person was arrested, whereas other counties provide them 24 hours behind, or even 3 days behind. A person may be added to our system today (Added Date) but may have been arrested two days ago. This is the reason for the different dates, Added and Booked.
- County
- This is the county that the individual was arrested in.
- Last
- The last name of the arrested individual.
- First
- The first name of the arrested individual.
- Street
- The street address of the arrested individual.
- City
- The city of the arrested individual.
- ST
- The state of the arrested individual.
- ZIP
- The ZIP of the arrested individual.
- ZIP-AGI
- The Average Gross Income of the arrestee's zip code. This is the average yearly income of individuals living in the arrestee's zip code. The date was sourced from the US Census data online.
- Charges
- The arrestee's charges. Some arrestee's may have up to three charges provided in the arrest list. You can easily search the charges or use the charge filter to see only arrestee's with specific charges. You can also hover over the charge entry to display a tooltip which will contain the full charge. We minimize the width of the charge entries for width reasons.
- Age
- The arrestee's age. This is calculated based on the arrestee's date of birth given by the county.
- Sex
- The arrestee's gender. Most counties include the gender of the arrestee, however some do not. The gender can either be 'M' for male, 'F' for female or 'U' for unavailable.
- Race
- The arrestee's race. Most counties include the race of the arrestee, however some do not. The race can either be 'W' for white, 'B' for black, 'O' for other or 'U' for unknown. Hispanic arrestee's are categorized as white and are therefore given a 'W' for race.
Sorting Columns
Every column in the arrest list, with the exception of the checkbox column, is capable of being sorted.
You can sort any of the columns by clicking the column header. When clicking the column header the rows will sort alphabetically or numerically. Clicking the column header will change the sorting to either ascending or descending.
The arrows indicate whether a column is being sorted ascending or descending. An arrow up means ascending and an arrow down means decending.
Added Date
The added date is the date in which the arrest record was added to our system. The Added Date may be different than the actual individual's book date. Some counties provide their arrest information on the same day, whereas other counties may have a one, two or three day lag. Record availability varies by each county in each state and unfortunately we are not in control of when each county releases their information. You can set your own default added date in the Table Settings >Added Date section.
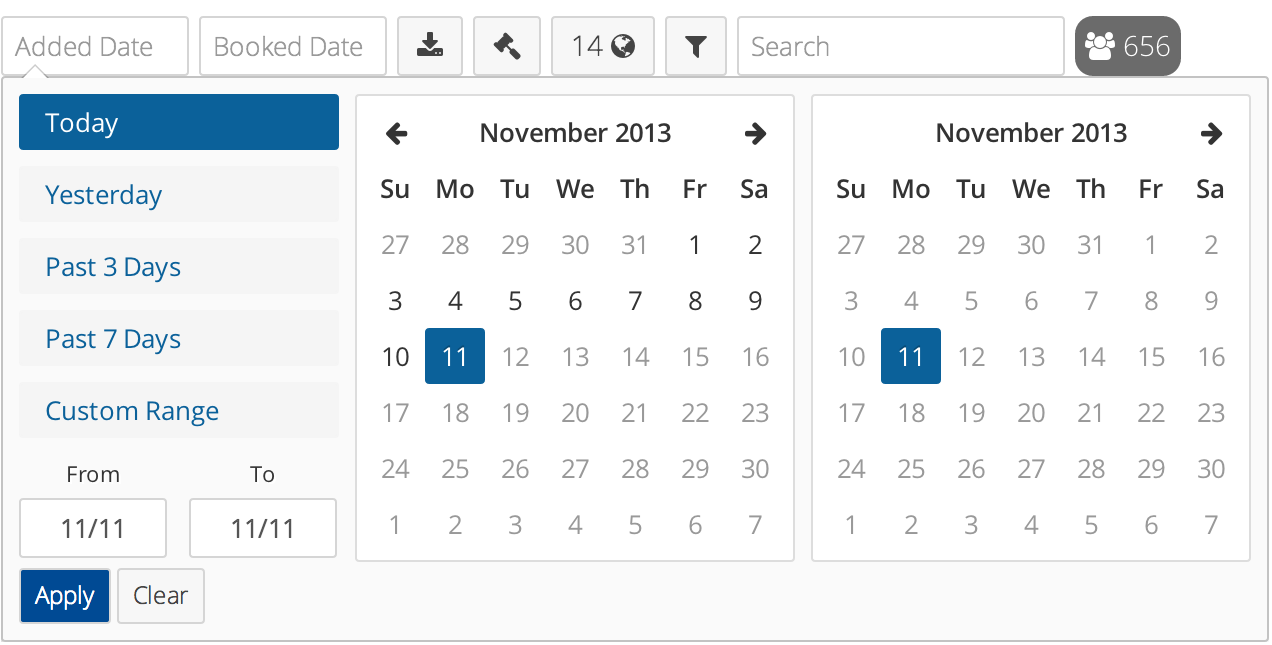
Added Date Input
When you click on the Added Date box a dropdown will appear. You can select a choice of preset dates such as today, yesterday, past 3 days or past 7 days. You can also create a custom date range using the date range picker. To enter a custom date range click the Custom Range button on the dropdown, then use the left calendar as the From date, and the right calendar as the To date.
Booked Date
The booked date is the date that the individual was arrested and booked into jail. The booked date can be different than the added date due to the fact that counties provide their records on different dates. Therefore, a booked date can be older than an added date. Some counties provide their arrest information on the same day, whereas other counties may have a 1, 2 or 3 day lag. Record availability varies by each county in each state and unfortunately we are not in control of when each county releases their information. You can set your own default booked date in the Table Settings >Booked Date section.
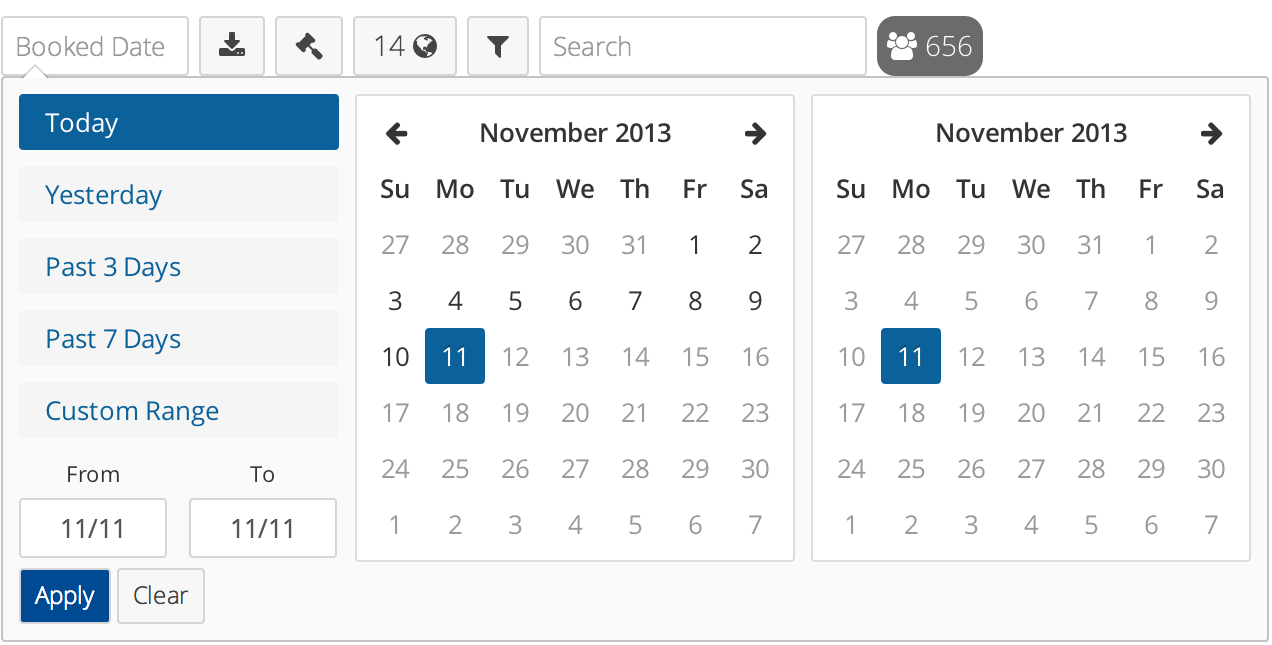
Booked Date Input
When you click on the Booked Date box a dropdown will appear. You can select a choice of preset dates such as today, yesterday, past 3 days or past 7 days. You can also create a custom date range using the date range picker. To enter a custom date range click the Custom Range button on the dropdown, then use the left calendar as the From date, and the right calendar as the To date.
Charge Filter
You will have the ability to automatically view record that contain specific charges that we have pre-filtered in our database. The charges dropdown will show the specific charges that have been pre-filtered. You can also use the search feature to instantly view only records that match the specific keywords you enter. You can activate a charge filter by default in the Table Settings >Charge Filter section.

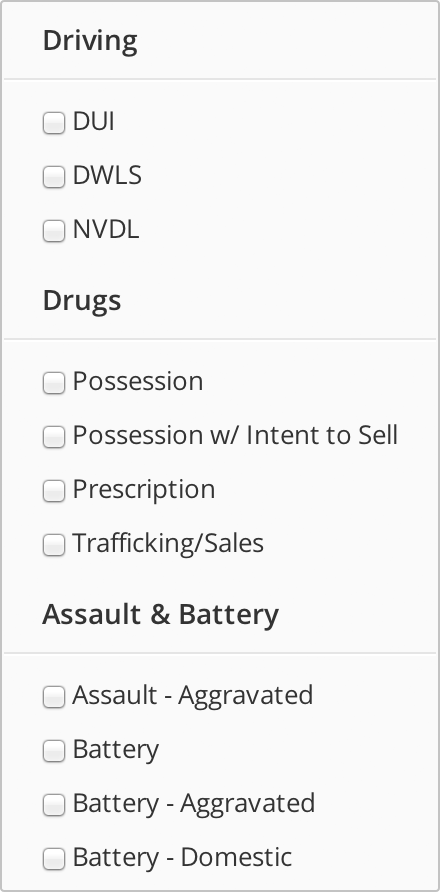
Charges Dropdown
We have implemented specific charges that are prefiltered with the click of a button. Simply select the charge you wish to see and only records with that specific charge will appear. You do not need to click a submit button as the table reacts immediately upon your selection.
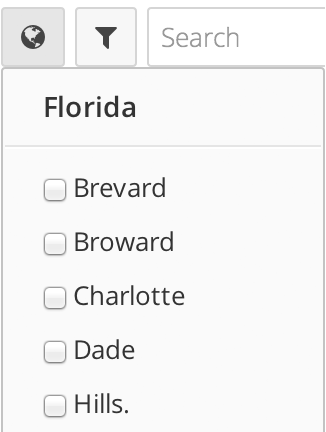
County Filter
Counties can be purchased individually or in a package. Each county you are subscribed to provides records for individuals arrested and booked in that specific county corrections system. The county is not the individuals' county of residence, but is the arresting county. You can set counties you only wish to view in the Table Settings >Counties section.

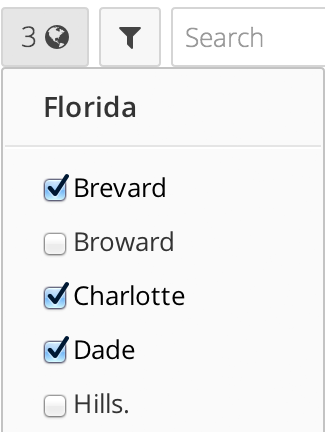
Counties Dropdown
You have the ability to select individual or multiple counties to display records for. Clicking the Counties button initiates a dropdown menu with the counties available for you to select. You will only be able to select counties that are included in your subscription.
Selecting a county will immediately highlight the selection and update the arrest table with the records for that county. Select or deselect counties on the fly and the table will immediately respond to your selections. The button will update showing how many counties you have selected. You do not need to click a submit button as the table updates automatically upon your selection.
Demographic Filters
You can filter the arrests by age, sex, race and ZIP-AGI. Click the filter button and the various filters will appear. Use the various demographic filters to narrow down the arrestees.

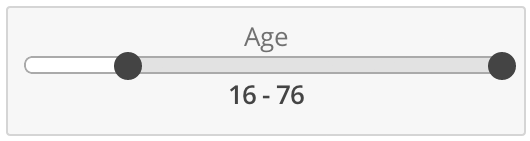
Age Slider
Use the age slider to filter the arrest table based upon a specific age range. The age slider automatically sets the age from youngest to oldest. Change the high or low value and the table automatically updates. You can set a default age range in in the Table Settings >Age Filter section.
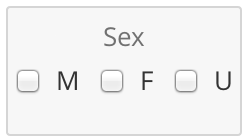
Gender Filter
Filter the arrest table based upon gender. Select the gender you wish to view in the table. The gender can either be 'M' for male, 'F' for female or 'U' for unavailable. You can set a default gender filter in in the Table Settings >Gender Filter section.
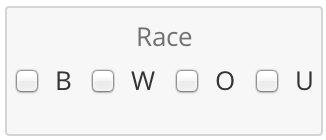
Race Filter
Filter the arrest table based upon ethnicity. Select the race(s) you wish to view in the table. The race can either be 'W' for white, 'B' for black, 'O' for other or 'U' for unknown. Hispanic arrestee's are categorized as white and are therefore given a 'W' for race. You can set a default race filter in in the Table Settings >Race Filter section.
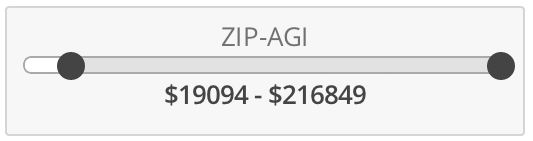
ZIP-AGI Slider
Specify a ZIP-AGI range and display only arrests that are within this range. The slider has two points, a low value and a high value. Adjust the separate values to narrow down your ZIP-AGI range. The ZIP-AGI filter automatically updates the table as you slide the low or high values. You can set a default ZIP-AGI range in in the Table Settings >ZIP-AGI section.
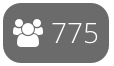
Arrest Counter
The arrest counter displays the total number of arrests in the table. This allows you to see exactly how many records are available based upon the dates or any of the filters. Changing any of the dates or filters will update the arrest counter to reflect the total number of arrests in the table.
Search Filter
The search feature of the arrest table is extremely useful if you are looking for specific charges, counties or people. Simply type the word or words into the search box and you will instantly see the list of records that match your query.

Instant Results
By utilizing the search box you can instantly filter out records that contain specific words. The search filter is instantaneous. As you begin typing you will see the arrest list begin to hide records that do not match your query. There is no need for a submit button for the search box as the table immediately updates as you type. A great feature that we highly recommend you take advantage of.
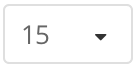
View Rows
The amount of rows you wish to view on one page can easily be changed. The default value is 15 rows and can be increased. The more rows viewable per page will increase the page height. You can set a default row count in the Table Settings >Rows section.
View Dropdown
If you wish to view more rows per page then select the View dropdown and the number of rows you wish to view. View up to 1000 records on one page without having to reload or reconfigure anything. You will be able to preset your preferred row count in your user settings. The table will automatically update after you select the amount of rows so there is no need to refresh the page.
Pagination
Depending on the amount of records in the table and the amount of rows you are viewing, the table will separate into pages. This is called pagination. Use the arrows to go to the next or previous page of records.

User Account
User Profile
Like most websites and web applications we have a User Profile page. This page contains generic information about your account. You can change your password, email address and other information on this page. You cannot change your username once your account has been created.
Change Password
If you wish to change your current password enter your new password twice, once in each box, and click Save User Profile. Once your new password is saved the old password will be invalid.

Change Email
You have the option of changing your email. This may be useful if you want to have any messages or notices sent to another email address. Enter your new email address and confirm the same address, then click Save User Profile.

Subscription
Your current subscription is shown to you on the right hand side of the User Profile page. You can see exactly what counties you are subscribed to as well as which ones are available. If you wish to edit your subscription please Contact Us.

Table Settings
Access your Table Settings by first visiting your User Profile page. On the User Profile page you will see the Table Settings tab. Table settings are your own personal settings for the arrest table. You can change the various aspects listed below in order to customize the table and ultimately make it more efficient for yourself.
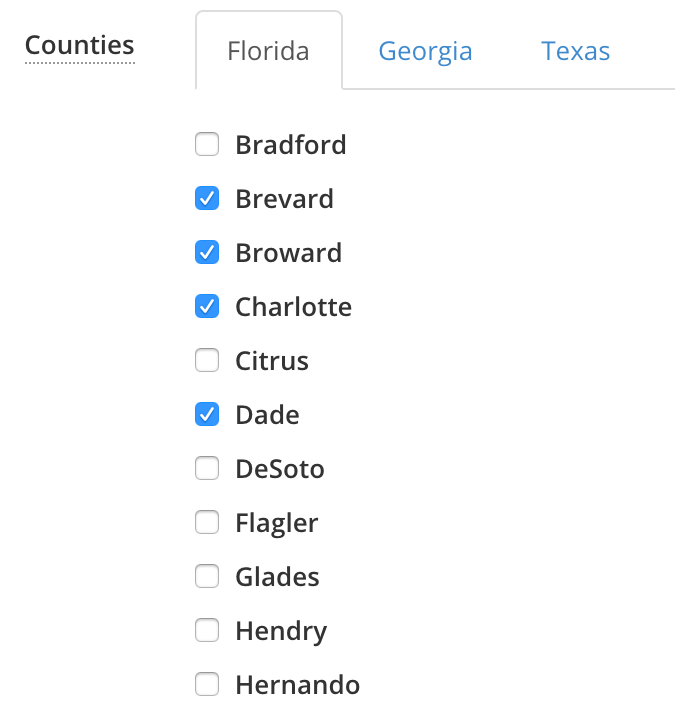
Counties
Based on your county subscription you can select the counties that you wish to see each time you login. Click each county that you wish to have as your default and each time you login you will see only those specific counties.
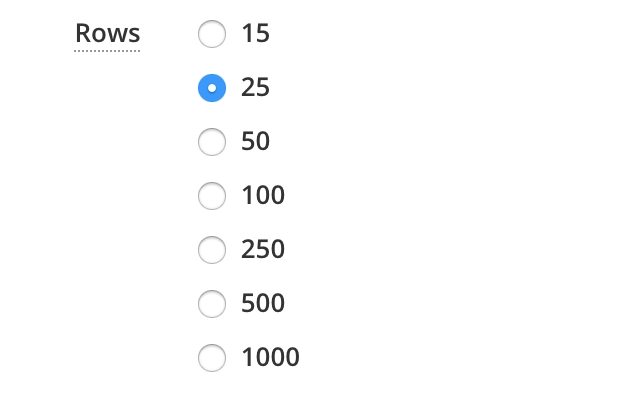
Rows
The arrest table offers the ability to view a different amount of rows per page. You can view anywhere from 15 to 1000 per page. Set your preferred default row count here and each time you login each page of the arrest table will be this length.
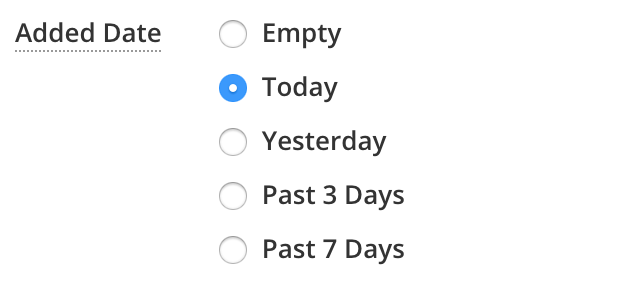
Added Date
The Added Date can be a specific day or range when viewing the arrest table. However, you may want to customize your arrest table to show you a specific date or range each time you login. You also have the option of leaving this set to "Empty" if you do not want a specific Added Date range as your default. We recommend leaving this set to "Today".
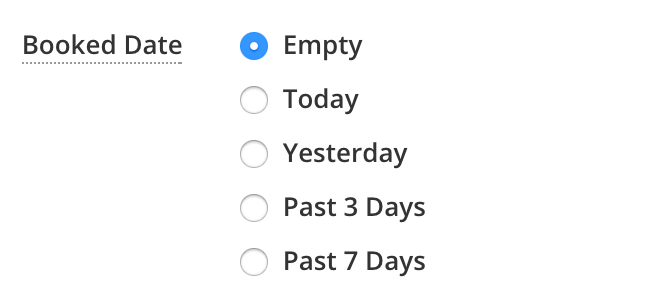
Booked Date
Exactly like the Added Date, the Booked Date can be customized. Select the Booked Date range you wish to have as your default each time you login and view the arrest table. You also have the option of leaving this set to "Empty" if you do not want a specific Booked Date range as your default. We recommend leaving this set to "Empty".
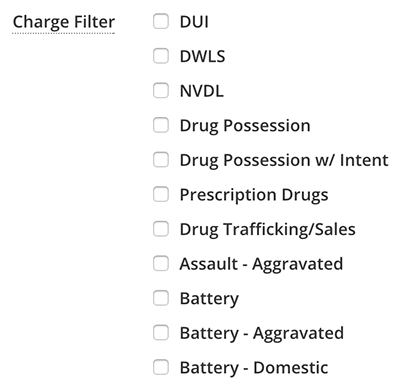
Charge Filter
In the event that you want to have a specific charge filtered automatically each time you login, you can. We will add more charge filters to the list as time progresses. Select the charge(s) you wish to have automatically filtered so that you will only see records with those specific charges when you log in.
Age Filter
Set a default age range for the arrest table. Set the minimum and/or maximum age range in the respective boxes. Leave a single box or both boxes blank to not set a min and/or max value.

Gender Filter
Set default genders to be the only ones viewable in the arrest table. If you select a gender then only arrestees with that gender will be viewable. The gender can either be 'M' for male, 'F' for female or 'U' for unavailable. Leave all unchecked to view all arrestees regardless of gender.

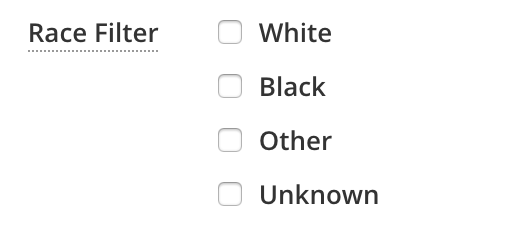
Race Filter
Set default ethnicities to be the only ones viewable in the arrest table. If you select a race then only arrestees with that race will be viewable. The race can either be 'W' for white, 'B' for black, 'O' for other or 'U' for unknown. Hispanic arrestee's are categorized as white and are therefore given a 'W' for race. Leave all unchecked to view all arrestees regardless of race.
ZIP-AGI Filter
Set a default minimum and/or maximum ZIP-AGI for arrestees you wish to view. Leave blank to not set any minimum and/or maximum ZIP-AGI.

Table Export Settings
Access your Export Settings by first visiting your User Profile page. On the User Profile page you will see the Export Settings tab. Export settings are your preferred settings for your export file as well as your PDF Quick Print.
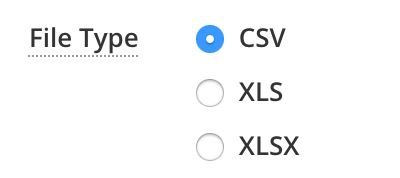
File Type
Select the file type as your preferred preset for file export. Once you have selected your file type preset, click save table settings. You will now be able to quickly export your selected records without having to select a file type each time.
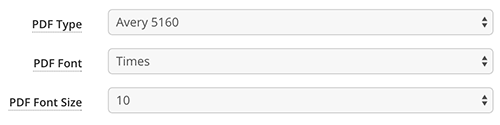
PDF Settings
Set your default PDF settings for export. This is very useful when you want to save time on doing a mail merge. The PDF capability allows you to export and print directly to labels and envelopes without using a word processor.
- PDF Type
- Select the specific type of Label or Envelope from the dropdown. *This must be selected or else you will receive a blank PDF.
- PDF Font
- Select the PDF font in the dropdown. The default font is Arial.
- PDF Font Size
- Select the font size in the dropdown. The default font size is 8.
Email Export Settings
Access your Email Export Settings by first visiting your User Profile page. On the User Profile page you will see the Email Export Settings tab. Email Export allows you to have a preconfigured export file automatically created and emailed to you every morning. This is useful for those who do not want to login and view the arrest table each day, and would instead like to have a file emailed daily.
Enabled
Enable or disable the direct email export. By default it is disabled.
Recipient Email
The email address that will receive the direct email export. By default it is your account email address.

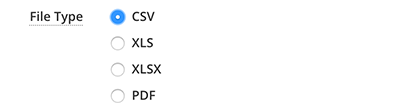
File Type
Select the file type you wish to receive. Note: If you select PDF you must configure the type, font and size for your PDF.
PDF Settings
If you selected PDF as your email export file type you will need to configure the PDF. For
details on PDF settings view the PDF Quick Print section.
- PDF Type
- Select the specific type of Label or Envelope from the dropdown. *This must be selected or else you will receive a blank PDF.
- PDF Font
- Select the PDF font in the dropdown. The default font is Arial.
- PDF Font Size
- Select the font size in the dropdown. The default font size is 8.
Counties
Based on your county subscription select the counties you wish to receive.
Added Date
The date that the person was added to our system. If you select today then you will receive arrests that were added to our system up until the time the email is sent in the morning.

Charge Filter
Select the charge(s) you wish to have automatically filtered so that you will only receive records with those specific charges. Leave blank if you wish to receive all arrests.
Gender Filter
Set default genders to be the only ones viewable in the arrest table. If you select a gender then only arrestees with that gender will be viewable. The gender can either be 'M' for male, 'F' for female or 'U' for unavailable. Leave all unchecked to view all arrestees regardless of gender.

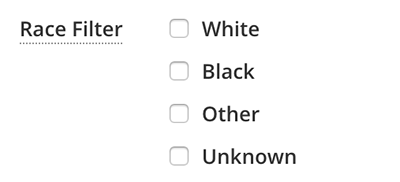
Race Filter
Set default ethnicities to be the only ones viewable in the arrest table. If you select a race then only arrestees with that race will be viewable. The race can either be 'W' for white, 'B' for black, 'O' for other or 'U' for unknown. Hispanic arrestee's are categorized as white and are therefore given a 'W' for race. Leave all unchecked to view all arrestees regardless of race.
Age Filter
Set a minimum and/or maximum age for arrestees you wish to receive. Some counties do not provide age information and arrestees are therefore indicated as age 0. Leave blank to not set any minimum and/or maximum age.

ZIP-AGI Filter
Set a minimum and/or maximum ZIP-AGI for arrestees you wish to receive. Leave blank to not set any minimum and/or maximum ZIP-AGI.

User Data
All of your exports are stored in our system so that you can always access them in the future. We will also be implementing reporting tools and statistical analysis tools in the future.
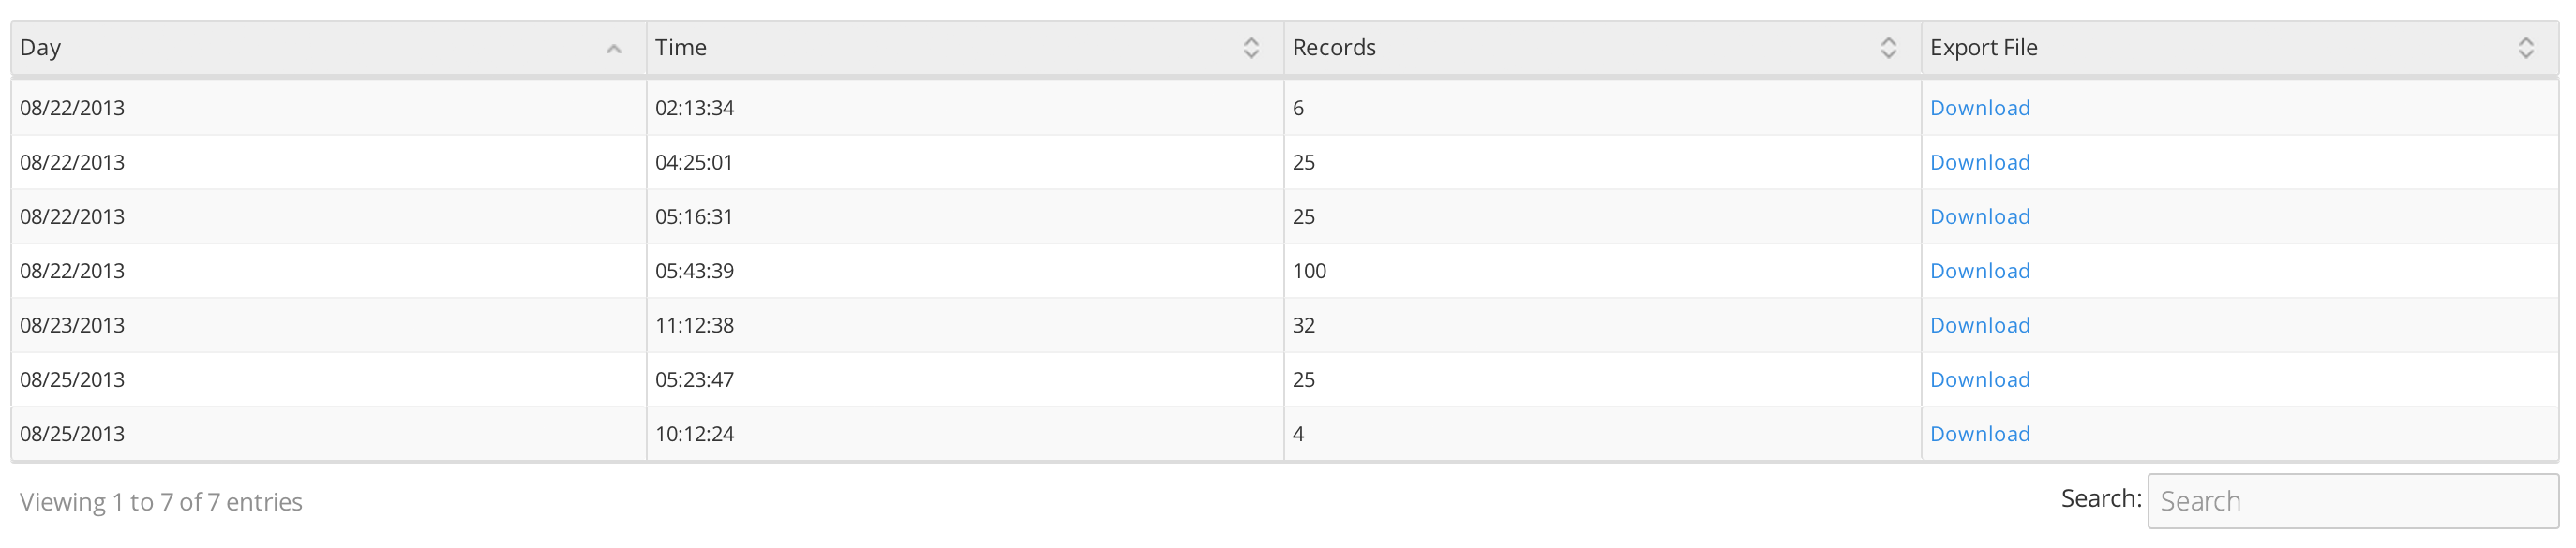
User Exports
Each time you perform an export we store the list in our system. You will have permanent access to all exports that you have performed. The export files will contain exactly the individuals you originally selected.
To access past exports simply click on User Data in the main navigation, then click User Exports in the dropdown. You will see a table containing your past exports. The date and amount of records exported is included in the table.
System Status
The status for all counties in all states can be found on the System Status page. States are separated by tabs. The System Status page contains the list of all counties available in our system along with their current status, number of records today, number of records on last update, last update time and notes.

Status
The status of a county can either be Online, Offline or Disabled. In the event that a county is unavailable we will provide a note as to why.
Records Today
Records today is the number of records that are currently available for the county during the current day. Some counties update more frequently than others. Some counties only update once in the morning, other counties update throughout hour. Our record availability varies depending on how each individual county provides their respective data.
Records on Update
The records on update are the number of records that were added to our system in the last system update. You can see the last update time in the adjacent column.
Last Update
The last update is the date and time that the county was last updated. This directly relates to the Records on Update number on the column to the left. The records on update is the number of records added to the Legal Grab system during the last update.
Notes
Most counties are online 99% of the time and a county being offline is rare. In the event that a county is offline or disabled we will provide notes as to why. In the notes we will provide as much information as possible as to why a county may be down as well as when we expect it to come back online.
PDF Quick Print
PDF Quick Print is the ability to print labels or envelopes using a PDF document as the label sheet. This removes the need to perform a mail merge with a word processing program. Depending on the label or envelope you are using for your mailers, the PDF is formatted so that the address information is placed in the correct location. The placement of the address information ensures that you can print directly from the PDF file to your printer with your labels or envelopes in the printer tray.
Labels
Easily print your labels using the PDF Quick Print feature when clicking the export button. The Export Window will provide a link to your preset PDF as well as the option to manually select a label type and style. Set your preset label type, font style and font size in your User Account >Export Settings.
Label Types
At this time we only support Avery®labels. However, many third party label vendors use the same Avery® label specs and state "same size as Avery®xxxx" on the product package. Below are the label types with a generic example PDF. You can always modify the PDF Font and Font Size to further customize your labels.
| Vendor | Number | Labels/page | Example |
|---|---|---|---|
| Avery® | 5160, 5260, 5520, 5660, 5810, 5960, 5970, 5971, 5972, 5979, 5980, 8160, 8460, 8660, 8810 | 30 | Download |
| Avery® | 5161, 5261, 5961, 8161, 8461 | 20 | Download |
| Avery® | 5162, 5262, 5522, 5962, 8162, 8252, 8462, 8662 | 14 | Download |
| Avery® | 5163, 5263, 5523, 5923, 5963, 5978, 8163, 8463, 8663, 8763 | 10 | Download |
| Avery® | 5164, 5264, 5524, 5734, 6464, 8164, 8464 | 6 | Download |
| Avery® | 5167, 5267, 5667, 8167, 8667 | 80 | Download |
| Avery® | 5168, 8168 | 4 | Download |
| Avery® | 5197 | 12 | Download |
| Avery® | 5266, 5066, 5366, 8366 | 30 | Download |
| Avery® | 5663 | 10 | Download |
| Avery® | 6871 | 18 | Download |
| Avery® | 6873 | 8 | Download |
| Avery® | 6874 | 6 | Download |
| Avery® | 6879 | 12 | Download |
Envelopes
Easily print your envelopes using PDF Quick Print. The Export Window will provide a link to your preset PDF as well as the option to manually select a envelope type with font styling options. Each page within the PDF will be one arrestee when using PDF Quick Print for envelopes. If you export 200 arrestees the PDF document will be 200 pages, each page being an individual envelope. Set your preset envelope type, font style and font size in your User Account >Export Settings.
Envelope Types
Below are the envelope types with a generic example PDF. You can always modify the PDF Font and Font Size in your Export Settings to further customize your envelopes.
| Style | Type | Size (inches) | Example |
|---|---|---|---|
| Business | 6 1/4 | 3.5 x 6 | Download |
| Business | 6 3/4 | 3.625 x 6.5 | Download |
| Business | 8 5/8 | 3.625 x 8.625 | Download |
| Business | 7 | 3.75 x 6.75 | Download |
| Business | Monarch 7 3/4 | 3.875 x 7.5 | Download |
| Business | 9 | 3.875 x 8.875 | Download |
| Business | 9 Policy | 4 x 9 | Download |
| Business | 10 | 4.125 x 9.5 | Download |
| Business | DL | 4.313 x 8.625 | Download |
| Business | 11 | 4.5 x 10.375 | Download |
| Business | 12 | 4.75 x 11 | Download |
| Business | 14 | 5 x 11.5 | Download |
| Business | 16 | 6 x 12 | Download |
| Square | 5 | 5 x 5 | Download |
| Square | 5 1/2 | 5.5 x 5.5 | Download |
| Square | 6 | 6 x 6 | Download |
| Square | 6 1/2 | 6.5 x 6.5 | Download |
| Square | 7 | 7 x 7 | Download |
| Square | 7 1/2 | 7.5 x 7.5 | Download |
| Square | 8 | 8 x 8 | Download |
| Square | 8 1/2 | 8.5 x 8.5 | Download |
| Square | 9 | 9 x 9 | Download |
| Square | 9 1/2 | 9.5 x 9.5 | Download |
| Announcement | A-2 | 4.375 x 5.75 | Download |
| Announcement | A-6 | 4.75 x 6.5 | Download |
| Announcement | A-7 | 5.25 x 7.25 | Download |
| Announcement | A-8 | 5.5 x 8.125 | Download |
| Announcement | A-9 | 5.75 x 8.75 | Download |
| Announcement | A-10 | 6 x 9.5 | Download |
Mail Merge
We have provided three separate mailing tutorials below. Simply follow the steps if you wish to print labels, envelopes or letters. Once you do the process a couple of times you will get the hang of it.
Print Labels
Follow the steps below to print labels using Microsoft Word mail merge.
Step 1
1. Open MS Word.
2. Select the Mailings tab to begin the mail merge process.

Step 2
1. Click "Select Recipients".
2. Select "Use Existing List".

Step 3
1. Browse to the location where you saved the export file.
2. Select the export file and click open.

Step 4
1. Click on "Start Mail Merge".
2. Select "Labels".

Step 5
1. Choose your Label Vendor based on your specific labels.

Step 6
1. Choose the Product Number of the labels after selecting the Label Vendor.
2. When finished setting both Label Vendor and Product Number, click OK.

Step 7
1. The document will now appear blank.
2. Click on the Address Block button.

Step 8
1. Click OK on the Insert Address Block window.

Step 9
1. The Address Block indicator will now appear as well as Next Record.
2. Click on Update Labels.

Step 10
1. Click on the "Preview Results" button.

Step 11
1. You will now see the labels with recipient address for each label.
2. Click on the "Finish &Merge" button.
3. Select "Print Documents".

Step 12
1. Select "ALL" and click OK.
2. Once you click OK, MS Word will print your labels.

Print Envelopes
Follow the steps below to print envelopes using Microsoft Word mail merge.
Step 1
1. Open MS Word.
2. Select the Mailings tab to begin the mail merge process.

Step 2
1. Click "Select Recipients".
2. Select "Use Existing List".

Step 3
1. Browse to the location where you saved the export file.
2. Select the export file and click open.

Step 4
1. Click on "Start Mail Merge".
2. Select "Envelopes".

Step 5
1. Choose your envelope options based on your specific envelopes.
2. When done setting your envelope options, click on the "Printing Options" tab.

Step 6
1. Choose your printing options based on your specific printer.
2. When finished setting both envelope and printing options, click OK.

Step 7
1. The document will now appear as an envelope.
2. Click on the bottom center of the document, where the address goes, until you see
a box.

Step 8
1. Once you see the box, select the "Address Block" button.
2. Click OK on the Insert Address Block window.

Step 9
1. The Address Block indicator will now appear.
2. This is showing you where the recipients address will be on the envelope.

Step 10
1. Click on the "Preview Results" button.
2. You will now see the first name and address you exported. Click the left/right
arrows to browse more of the recipients.

Step 11
1. Click on the "Finish &Merge" button.
2. Select "Print Documents".

Step 12
1. Select "ALL" and click OK.
2. Once you click OK, MS Word will print envelopes for each of your recipients.

Print Letters
Follow the steps below to print letters using Microsoft Word mail merge.
Step 1
1. Open MS Word.
2. Select the Mailings tab to begin the mail merge process.

Step 2
1. Click "Select Recipients".
2. Select "Use Existing List".

Step 3
1. Browse to the location where you saved the export file.
2. Select the export file and click open.

Step 4
1. Click on "Start Mail Merge".
2. Select "Letters".

Step 5
1. Click Address Block to insert the individual's address block onto your letter.
2. The address block will be inserted on the line you are on in your document. In
this tutorial, we are on the first line of the letter.

Step 6
1. When the address block windows appears, verify that the format is ok.
2. When you are satisfied with the format click OK.

Step 7
1. The Address Block identifier will now appear on the letter.
2. Click on the Greeting Line button to insert the personalized greeting line.

Step 8
1. The Greeting Line identifier will now appear.
2. Type your letter body with your marketing content. The actual content of the
letter is up to you.

Step 9
1. Your letter is now ready for printing.
2. Preview the letter before you print by clicking on the "Preview Results" button.
3. You will now see the letter as it will appear when printed.

Step 10
1. Click on the "Finish &Merge" button.
2. Select "Print Documents".

Step 11
1. Select "ALL" and click OK.
2. Once you click OK, MS Word will print a personalized letter for each of the
individuals you selected on Legal Grab.
